
Localization helps your WordPress site feel natural to visitors in different languagesm especially in menus, buttons, and theme/plugin text. In this guide, you’ll learn how to translate WordPress themes and plugins using Poedit by creating .po and .mo files the right way.
You can change WordPress’s main language in Dashboard → Settings → General → Site Language. But themes and plugins include their own translatable strings, usually managed through gettext files (.pot, .po, .mo) tied to a text domain. Poedit is a simple desktop editor for creating these translation files.
Here’s the article summary:
- Understanding PoEdit: A Brief Overview
- The Basics of WordPress Localization
- Step-by-Step Guide: Translating Your Site with PoEdit
- Alternatives to Poedit: Translation Plugins
- Conclusion
Understanding PoEdit: A Brief Overview
PoEdit is a translation editor that provides an easy and intuitive platform for translating software. It was created to help developers manage their translation processes, and has since become popular with WordPress website translators across the globe.

The Basics of WordPress Localization
Before we dive into translating WordPress with PoEdit, let’s first explore WordPress localization and the role of .po and .mo files. Localization is the process of adapting software to meet a particular location, culture, or language. WordPress operates on the gettext framework, which specifies how to translate strings from one specific language file to another. PoEdit makes this process easy for WordPress website owners and developers by creating .po and .mo files. The .po file contains all human-readable translations of your website’s text, while the .mo file is what WordPress uses to load the translations.
On our portfolio WordPress themes those files are located in the theme’s languages folder.
Step-by-Step Guide: Translating Your Site with PoEdit
Now that we’ve got a basic understanding of WordPress localization and PoEdit, let’s get into the practical part of our tutorial – translating your site with PoEdit. To illustrate this, we’ll use our Caverta theme.
Step 1: Set your site language in WordPress
First make sure your site has your local language selected. For that go into your website’s WordPress dashboard > Settings > General > Site Language option and select your language.

Step 2: Install Poedit
Go to PoEdit website, download and install it on your preferred operating system.
Step 3: Create a new translation from the .POT file
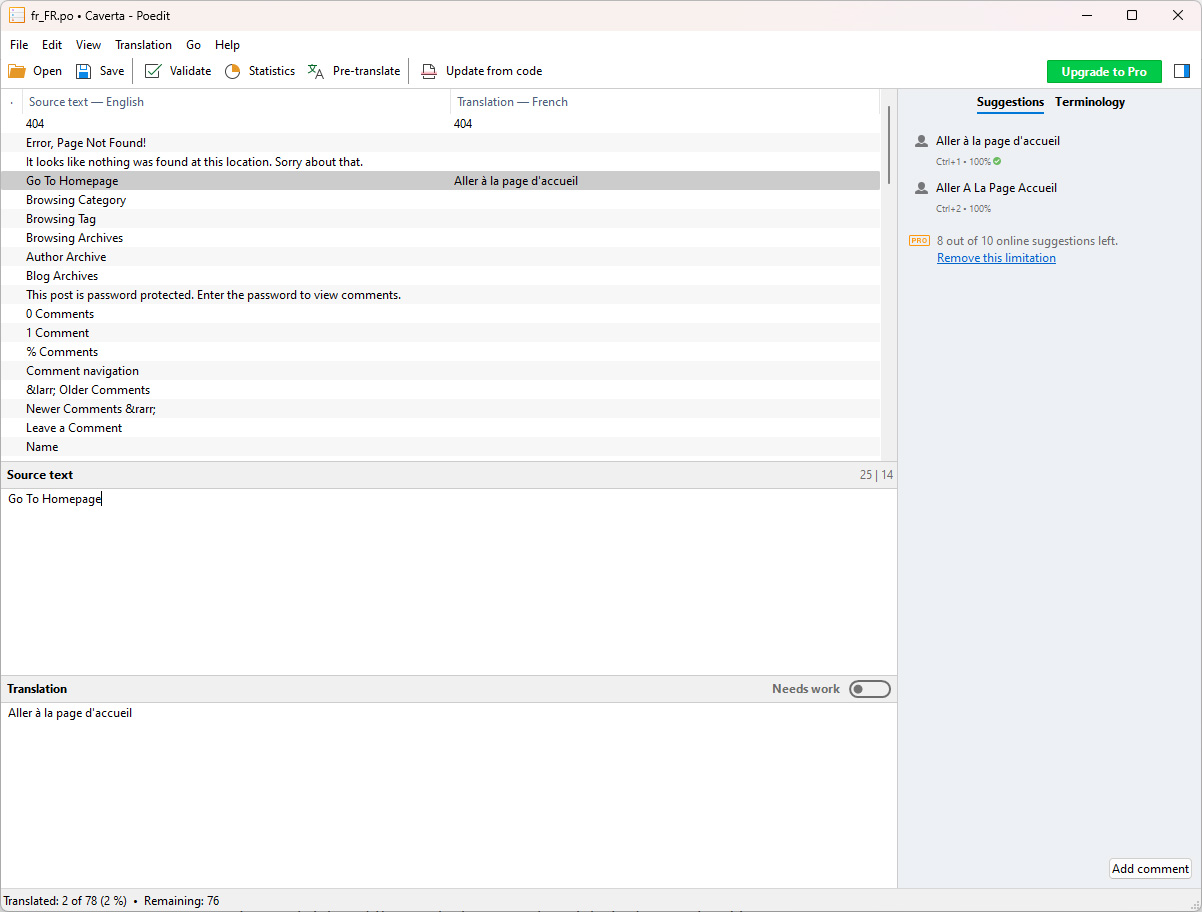
Open the POEdit editor, go to File > New from POT/PO file… and select it. Navigate to the Caverta theme languages folder and select the “caverta.pot” file. A new pop-up window will appear “Translation Language”. Select the language that matches with your site language from WP Dashboard > Settings > General > Site Language option.

Step 4: Save using the correct locale (and naming)
Fill in the translations, and save the changes. When you first save the file, make sure you save it in the WordPress locale language code (e.g.: for French language the code is fr_FR ). So the saved file name should look like this: fr_FR.po . View all WordPress locale language codes.
Tip: Some themes/plugins expect the filename to include the text domain, like textdomain-fr_FR.po and textdomain-fr_FR.mo. If your translation doesn’t load, check the theme’s Text Domain in style.css (or the plugin header) and use that in the filename.
Step 5: Upload translation files to the correct folder
In your Caverta theme’s languages folder you should see 2 new files: fr_FR.po and fr_FR.mo. Upload them to your server in wp-content/themes/caverta/languages folder.
Important: If your theme gets updates, translations stored in the parent theme folder can be overwritten. To keep translations safe long-term, place them in a child theme languages folder instead.
WordPress can load translation files from global folders like wp-content/languages/themes and wp-content/languages/plugins (depending on the text domain and setup). If a translation doesn’t load from a theme/plugin folder, try the appropriate global languages folder.
Congratulations! Your website is now translated into your local language.
Common Issues (If Translations Don’t Show)
- Wrong filename: try
textdomain-locale.mo(example:caverta-fr_FR.mo) iffr_FR.modoesn’t load. - Wrong folder: confirm the theme/plugin uses
/languages, or trywp-content/languages/themes/wp-content/languages/plugins. - Text domain mismatch: check the theme’s
style.cssheader “Text Domain” (or plugin header) and match it exactly. - Cache: clear any caching plugin/CDN cache after uploading new
.mofiles. - Updates overwrote files: store translations in a child theme instead of the parent theme.
Alternatives to PoEdit: WordPress Translating Plugins
Loco Translate is the easiest option if you want to translate theme/plugin strings directly inside the WordPress dashboard. It’s convenient for quick edits without downloading files.
WPML is best when you need a full multilingual site (pages, posts, menus, custom post types) with translation management workflows. It’s a premium solution geared toward larger sites.
Polylang is a popular choice for running a multilingual site with a lighter setup. It works well for the majority of WordPress themes and plugins that need multiple languages without heavy translation workflows.
Conclusion
PoEdit is an excellent translation tool for WordPress website owners and developers. In this guide, we’ve provided detailed information on the basics of WordPress localization and a step-by-step guide to translating WordPress with PoEdit. Remember to stay up to date with your WordPress, and back up your website regularly. Best of luck translating your WordPress website with PoEdit!


