
The WordPress memory limit, also called the PHP memory limit, is the maximum amount of memory your site’s scripts can use. If your site runs many plugins, uses heavy themes, or processes large media files, you may see errors like Allowed memory size exhausted or Out of memory.
These errors happen when WordPress needs more memory than your server currently allows. In most cases, you can fix the problem by increasing the memory limit in wp-config.php or, on some servers, in .htaccess.
In this guide, you’ll learn how to check your current PHP memory limit, how much memory a WordPress site usually needs, and two ways to increase the WordPress memory limit safely.
How Much PHP Memory Does a WordPress Site Need?
For many WordPress sites, a PHP memory limit of 128 MB to 256 MB is enough. Larger sites, such as WooCommerce stores, membership sites, or sites using page builders and many active plugins, may need 512 MB.
The right amount depends on:
- Traffic levels: More visitors can increase server resource usage.
- Plugin and theme usage: Heavy plugins, builders, and poorly optimized themes can use more memory.
- Media processing: Large images, video handling, and imports can temporarily increase memory use.
- Hosting environment: Some hosts set lower limits or override custom values.
If you only see memory errors occasionally, start with 256M. If your host allows it and your site still runs into errors, test 512M.
How to Check Your Current PHP Memory Limit in WordPress
Before we dive into increasing your WordPress memory limit, it’s essential to know where you’re starting from. Here’s how we check our site’s current memory limit:
1. Log in to your WordPress dashboard.
2. Go to Tools > Site Health.

3. Open the Info tab at the top.

3. Expand the Server section and look for the PHP memory limit field. This will show you the current memory allocation for your site.

By following these steps, we can determine if our site is running on the default 32 MB or if it’s already been adjusted. Knowing this helps us decide how much more memory we need to allocate. Checking your current memory limit is a straightforward process that ensures we’re making informed decisions about our site’s performance.
How to Increase the WordPress Memory Limit: 2 Safe Methods
Before making any changes, create a full backup of your site. Using a reliable WordPress backup plugin can help you restore your site quickly if anything goes wrong.
Here are two easy methods to help us boost our site’s performance:
Method 1: Increase the Memory Limit in wp-config.php
The most common way to increase the WordPress memory limit is to edit the wp-config.php file. You can access it with an FTP client such as FileZilla or through your hosting file manager. The file is usually located in your site’s root folder, such as public_html or www.
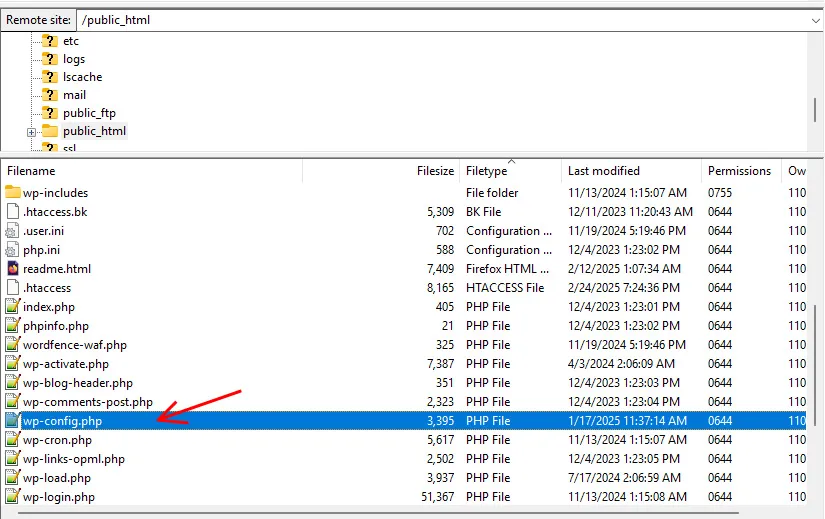
Before editing anything, download a backup copy of wp-config.php.
Open the file and look for this line:
define('WP_MEMORY_LIMIT', '32M');If the line already exists, change the value to a higher limit such as 256M.
If the line does not exist, add it just before the line that says “/* That’s all, stop editing! Happy publishing. */”:
define('WP_MEMORY_LIMIT', '256M');Save the file, upload it if needed, and then clear your site cache and browser cache. Go back to Tools > Site Health > Info > Server and confirm whether the PHP memory limit has changed.
If the value does not change, your hosting provider may enforce its own PHP memory limit. In that case, contact your host and ask whether they allow custom memory limit changes for your plan.
Method 2: Increase the Memory Limit in .htaccess
This method only works on some Apache server setups. If your host uses Nginx or blocks PHP directives in .htaccess, these changes may not work.
Here’s how to try this method:
Locate the .htaccess file: Use an FTP client to find it in your site’s root directory. Since it’s a hidden file, ensure your FTP client is set to show hidden files.
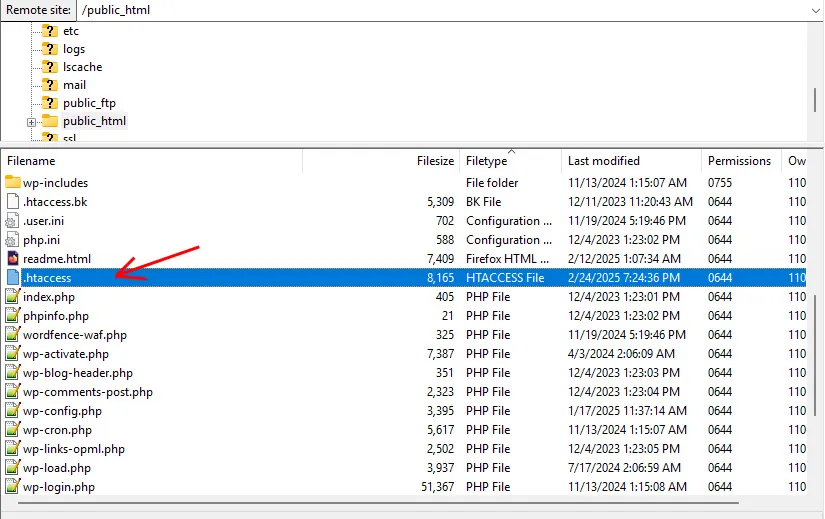
Backup the file: Before making any changes, download a copy of your current .htaccess file. This way, we can quickly restore it if something goes wrong.
Add memory limit rules: Open the .htaccess file in a text editor and add these lines at the end.
php_value memory_limit 256M
php_value upload_max_filesize 64M
php_value post_max_size 64M
php_value max_execution_time 300
Make sure these new rules are placed after any existing WordPress rules.
Save the file and upload it back to the server if needed. Then test your site and check Tools > Site Health > Info > Server again.
If your site shows a 500 Internal Server Error, remove the lines you added and restore the backup. This usually means your server does not allow these directives or the value is too high.
Common WordPress Memory Limit Issues and Fixes
If increasing the WordPress memory limit does not work, one of these issues may be the reason:
- Your host overrides the value: Some managed WordPress hosts set a fixed PHP memory limit. Ask your hosting provider whether your plan allows custom changes.
- The server does not support .htaccess PHP rules: This is common on Nginx servers or restricted hosting environments.
- The new value is too high: If 256M causes errors, try 128M first.
- A plugin or theme is using too many resources: Increasing memory may help temporarily, but you should also identify heavy plugins, imports, or background tasks.
- A 500 Internal Server Error appears: Revert your last change, restore the backup file, and test again.
If you still cannot fix the problem, contact your hosting provider and ask them to check the PHP memory limit, server logs, and account restrictions.
Conclusion
Increasing the WordPress memory limit can help fix common errors such as Allowed memory size exhausted and improve stability when your site runs resource-heavy plugins, themes, or media tasks. In most cases, the best place to make this change is wp-config.php. On some servers, you may also be able to increase the PHP memory limit through .htaccess.
If the new value does not apply, your hosting provider may be overriding it. In that case, contact your host or review your server settings. For better long-term performance, also look at plugin usage, image optimization, caching, CDN.


