
Ever felt stuck trying to make your website look more professional, visually appealing, or just plain awesome? You’re not alone. A lot of people ask, “How do I add multiple images to my WordPress post without it looking like a hot mess?” or, “Do I really need a plugin for everything?” The answer? Nope.
You don’t need a fancy plugin. You just need to know how to use WordPress gallery block like a pro. Let’s break it down step-by-step, keep it simple, and make sure you walk away knowing exactly how to create a killer image gallery on your site.
Table of Contents
- What Is the WordPress Gallery Block?
- Why Use the WordPress Gallery Block?
- How to Add the WordPress Gallery Block
- Best Practices for Using the WordPress Gallery Block
- FAQs
- Conclusion
What Is the WordPress Gallery Block?
The WordPress Gallery block is like your secret weapon for showcasing multiple images in one spot. Think of it as a grid where you can upload photos, arrange them however you like, and customize settings – all without leaving the editor. No coding. No plugins. Just drag, drop, and done.
Why Use the WordPress Gallery Block?
If you’ve ever tried to add multiple images to a WordPress post without using the right tools, it probably looked like chaos. Random sizes. Misaligned photos. A total mess. That’s where the WordPress Gallery block comes in. It’s not just a feature; it’s a lifesaver for anyone who wants their site to look polished without spending hours on design. Here’s why we love it (and why you will too):
- It’s Fast: You can upload all your images at once and arrange them in seconds. No need to add them one by one.
- It Looks Professional: The Gallery block automatically organizes your photos into clean grids. No more random layouts.
- It’s Customizable: Want 2 columns? 4 columns? Cropped images? Full-size? You’re in control.
- It Boosts SEO: Add alt text and captions to make your images more search-engine friendly.
- No Plugins Needed: Skip the extra downloads that slow down your site. The Gallery block is built right into WordPress.
Here’s an example: imagine you’re running a food blog. Instead of dumping 10 photos of your latest recipe into a post, use the Gallery block to create a sleek, scrollable grid. Readers stay engaged longer, and your site looks way more professional.
How to Add the WordPress Gallery Block
Let’s talk about the basics – how do you actually add the WordPress Gallery block to your post or page?It’s super simple, and you don’t need to be a tech wizard to figure it out. Here’s the step-by-step breakdown:
Step 1: Open Your Page or Post
First, head over to the page or post where you want to add your gallery. You can either create a new one or edit an existing one.
Step 2: Add a New Block
Click on the little “+” icon (Add Block button). In the search bar, type “Gallery.” Once it pops up, click on it – or better yet, drag and drop it right into your editor.
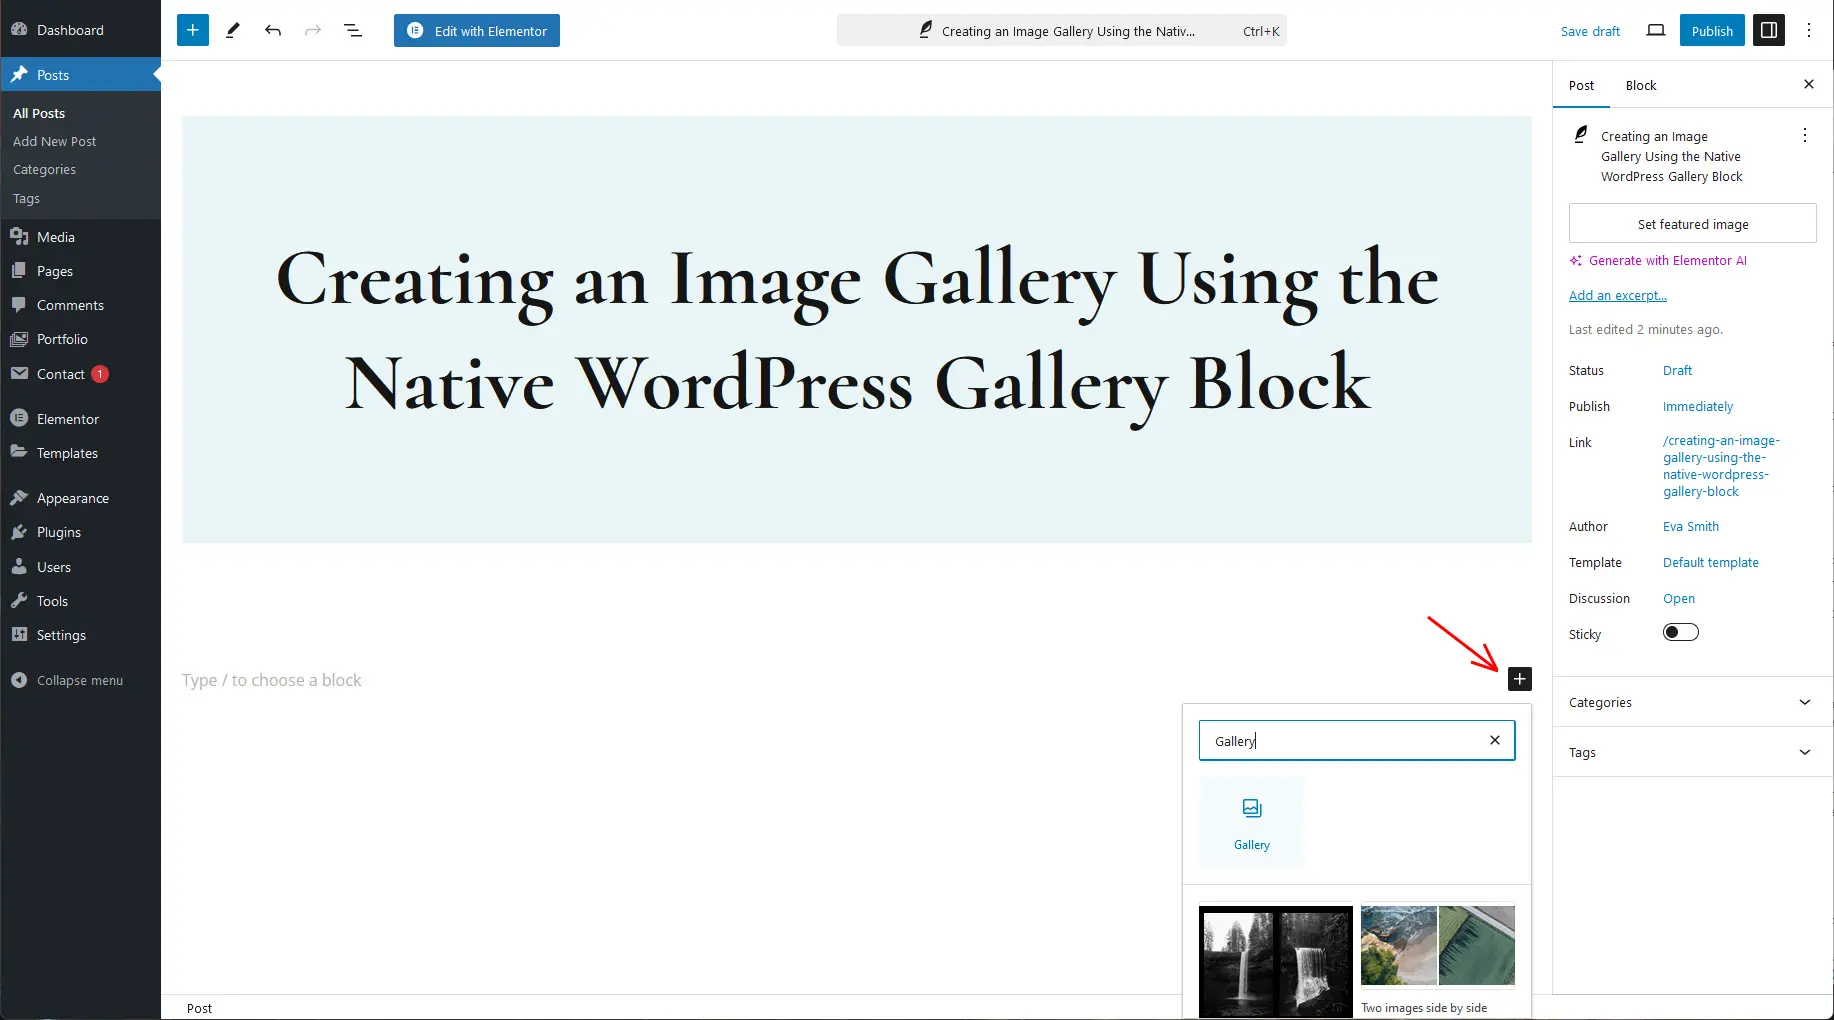
If you’re all about speed like me, just type “/gallery” directly into the editor and hit Enter. Boom. The Gallery block is ready to go.
Step 3: Add Your Images
Now comes the fun part—adding your photos. You’ve got two options:
- Upload: Select images straight from your device.
- Media Library: Pick from photos you’ve already uploaded to WordPress.

Step 4: Arranging Your Gallery Images
Here’s where the magic happens. Once your photos are in, drag and drop them into the perfect order. Click on any image to add captions ( great for context or storytelling ). Want to delete an image? Hit the little “X” on its thumbnail.
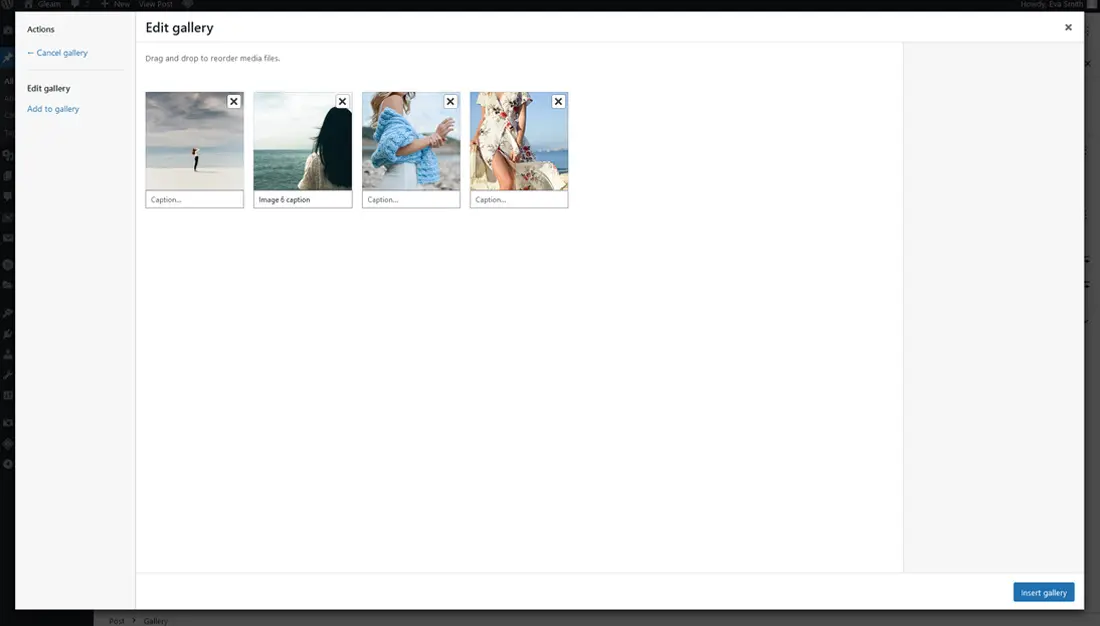
Example: Let’s say you’re creating a gallery for a wedding shoot. Arrange the photos chronologically – ceremony first, then reception – so viewers feel like they’re reliving the day.
Step 5: Customizing Your Gallery Settings
Customizing your gallery settings is super easy. You don’t need to be a designer or mess with complicated tools. Let me show you how to tweak things so your gallery looks clean, professional, and exactly the way you imagined.

Adjust the Layout
- Columns: Decide how many images you want side by side.
- Crop Images: Got photos of different sizes? Turn on “Crop Images” to make everything uniform. This keeps your gallery looking polished.
- Image Size: Choose from Thumbnail, Medium, Large, or Full Size depending on how much detail you want to show.
Link Options
Want your images to be clickable? Use the “Link To” setting:
- Media File: Opens the full-size image.
- Attachment Page: Links to a separate page for each photo.
- None: Keeps it simple – no links.
Fine-Tune Individual Images
Click on any photo in your gallery:
- Add captions for context or storytelling.
- Rearrange images by dragging and dropping.
- Remove an image with one click if it doesn’t fit.

Example: Imagine you’re creating a photography portfolio. Use 3 columns with cropped images for a clean grid, and link each photo to its full-size version so clients can zoom in on details.
Step 6: Publishing Your Gallery
Once everything looks good:
- Click “Publish” (or “Update” if you’re editing an existing page).
- Preview your post to see how it looks live.
- Need tweaks? Go back and adjust settings until it’s perfect.
Done! Your image gallery is now live.
Best Practices for Using the WordPress Gallery Block
Want to make your galleries look professional and polished for your photography website? Let’s talk about how to get the most out of the WordPress Gallery block. These best practices will save you time, improve your site’s performance, and keep your visitors engaged.
1. Optimize Your Images
Uploading massive, uncompressed images is a rookie mistake. Here’s how to avoid it:
- Compress Your Files: Use tools like TinyPNG or ShortPixel to shrink image sizes without losing quality.
- Descriptive File Names: Rename files to something meaningful like “mountain-forest.jpg” instead of “IMG1234.jpg.” This helps with SEO and makes your gallery easier to manage.
- Alt Text: Add alt text for every image. It’s great for accessibility and boosts your search rankings.
2. Use Captions Wisely
Captions can make your gallery more engaging and informative:
- Tell a story (e.g., “Our team celebrating after launch”).
- Provide context (e.g., “Step 1: Mix ingredients”).
This small detail adds personality and keeps viewers hooked.
3. Keep It Simple
Don’t overwhelm visitors with too many images. Stick to 10-15 high-quality photos max. A cluttered gallery can feel chaotic and drive people away.
FAQs About the WordPress Gallery Block
1. Where Do I Find the Gallery Block in WordPress?
Finding the Gallery block is super easy.When you’re editing a post or page, just click the “+” icon in the editor to add a new block.In the search bar, type “Gallery,” and it’ll show up instantly.
2. Can I Add Links to My Images?
Yes, you can absolutely add links to your images! In the settings panel on the right, look for the “Link To” option.
3. Can I Use This Block Anywhere on My Site?
Absolutely! The WordPress Gallery block isn’t limited to just posts or pages. You can also use it in widgets for areas like your footer or sidebar. For instance, if you want a photo gallery in your site’s footer showcasing recent projects or events, simply add the block there using a widget.
4. How do I add more images to an existing gallery?
Select the Gallery Block, then click the “Add” button in the toolbar above the block to upload new images or select from the Media Library.
5. How do I reorder images within the Gallery Block?
You can reorder images by selecting the Gallery Block, clicking on an individual image, and using the left/right arrows in the toolbar to move the image within the gallery.
6. Why Not Just Use Image Gallery Plugins?
Good question! Plugins are great if you need advanced features like lightboxes or filters. But for most people, the native WordPress gallery block gets the job done without slowing down your site with extra code.
Final Thoughts for WordPress Gallery Block
WordPress gallery block isn’t just about adding pretty pictures – it’s about creating an experience for your audience. With just a few clicks, you can transform any post or page into something visually stunning that keeps visitors engaged longer.
So next time someone asks how you made such an amazing photo gallery, you’ll know exactly what to say – and you won’t even need a plugin! Go ahead – try it out today and see how much better your site looks with galleries that pop!

